
You can use the Data Validation feature, which enables you to add rules for what’s acceptable in certain cells. Excel makes it quite easy to specify validation criteria. You can apply the following validation options:
- any value
- whole number
- decimal
- list
- date
- time
- text length
- custom
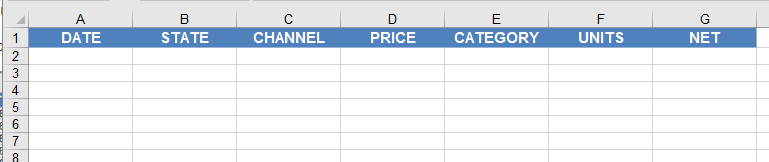
For example, the following table can use validation in several columns:
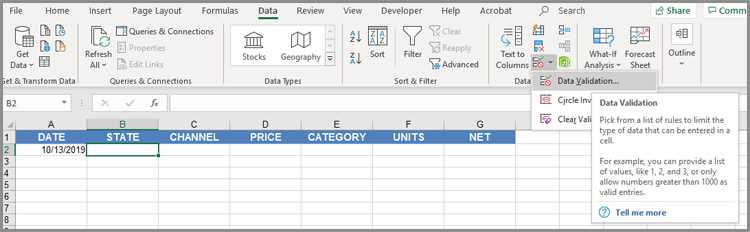
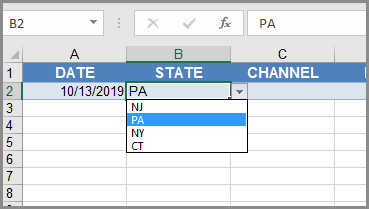
To set the values for the State column, select cell B2, and then select Data > Data Tools > Data Validation. We will only allow specific states that appear on a list to be entered in this column.
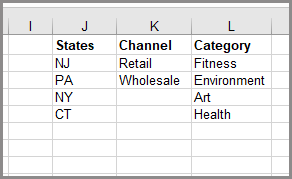
On the Settings tab, select List from the Allow section, and from the Source box, highlight the range in cells J2 through J5, which contains the list of states allowed.

The following two additional ranges were defined for allowed values in the Channel and Category columns. They were set up like the States column was.
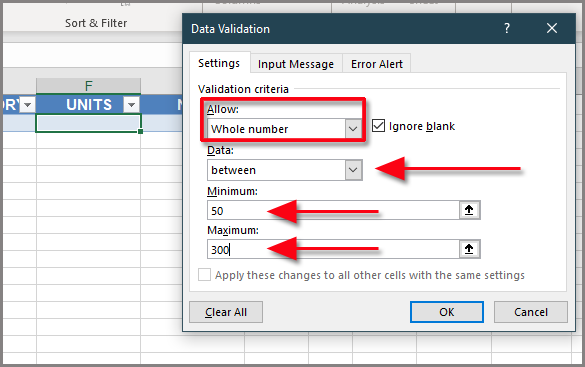
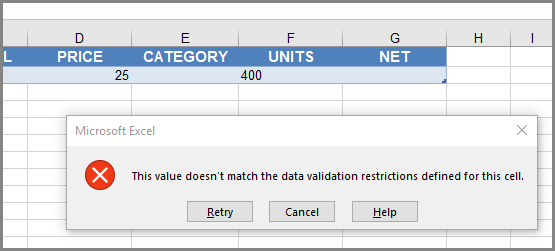
Select F2 and in the Units column you can set up validation to restrict values between 50 and 300. Select Whole number in the Allow category, between in the Data category, and type in the minimum and maximum numbers allowed.
Once these settings have been defined, data entry is restricted for those columns. The State, Channel, and Category columns will each have drop-down arrows displaying the items in the respective allowed lists.


In the Units column, if a value outside the allowed values of 50 and 300 is entered, a default error message will appear. You can customize the error message if you like from the Error Alert tab in the Data Validation dialog.
If you’ve set the range up as a table, the validation rules will be duplicated for each new row.

This is an awesome timesaver when you’re doing repetitive data entry, and can also go a long way in preventing incorrect entries in your spreadsheets.
0 Comments